There are so many wonderful uses for homemade chicken stock—risottos, soups, stews, baked meat dishes, and more. Here’s a list of recipes we’ve shared that call for chicken stock. It’s also delicious to sip on its own with a bit of salt, especially if you’re feeling under the weather.
If you have any chicken bouillon cubes in your cupboard, please toss them out now. Most of them contain MSG or artificial flavours. Use water instead until you make your own chicken stock, or buy organic jarred stock with natural ingredients.
We usually make chicken stock once a year. Ralph buys the chicken backs from our Friday Bargteheide farmers’ market Lamb Guy (Ralf Stoffers), ordering them about a week or two in advance.
The total cost of the chicken backs—10 kg—was €25, and we canned 45 jars (with a few extras in the fridge). Ralph calculated that the cost of the vegetables, herbs, spices, and electricity—around €1.50 per jar—is far less than buying stock, and you know exactly what’s in each jar.
If you’re not comfortable canning the stock, it also freezes well. For risotto, freeze portions in 4-cup/1-litre containers.
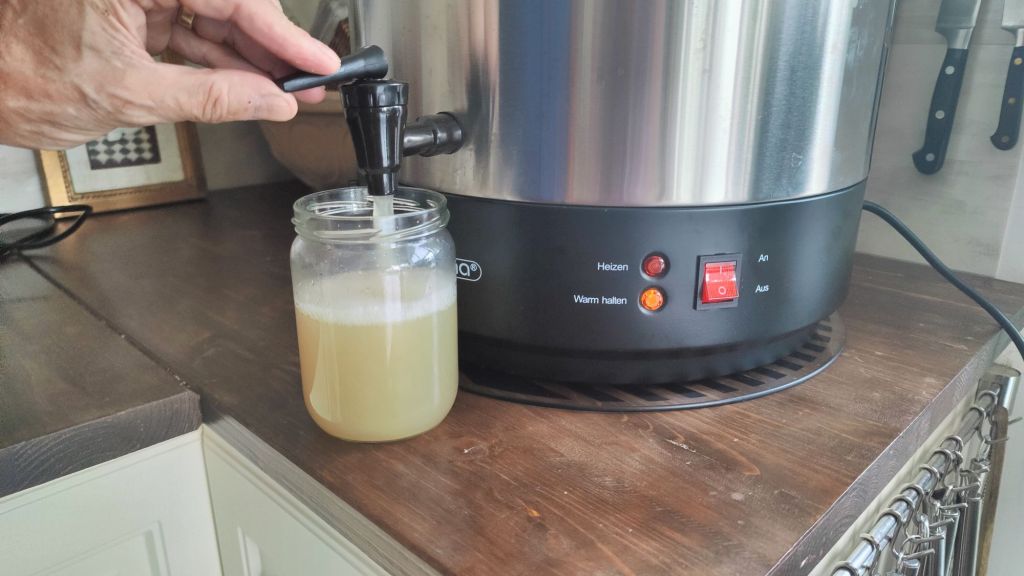
For canning stock, we highly recommend investing in a large stainless-steel cooker with a hot-drink dispenser (see link below), as it makes filling the jars much easier than ladling the stock in.
Note: Depending on the size of your pressure cooker, the whole process can take 8 to 10 hours, including pressure canning. We usually make the stock one day and can the next.
Ingredients (per batch, so for us x 4):
- 2.5 kg chicken backs, 5 pieces (we had 10kg total, 20 pieces)
- 400 g celery root
- 4 small cooking onions, peeled and halved
- 3 large carrots
- 5 large cloves of garlic (unpeeled)
- 1 Tbsp peppercorns
- 2 bay leaves
- 1 handful of parsley
Equipment:
- Large pressure cooker (ours is 8L max and can fit 5 jars at once)
- 28 L stainless-steel mulled wine cooker with a hot-drink dispenser (we used this one)
- 500 ml glass jars (if canning)
Instructions (making stock):
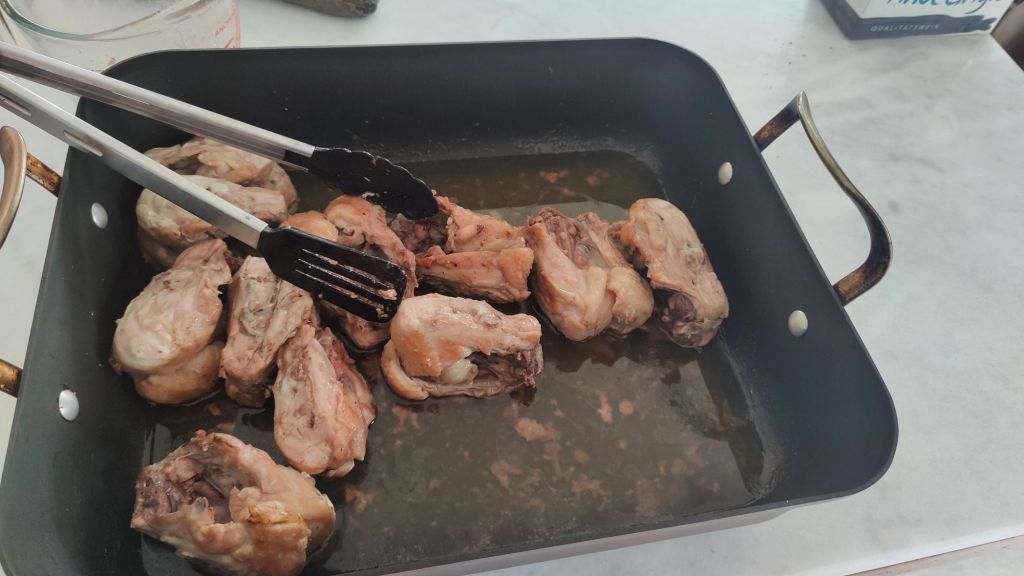
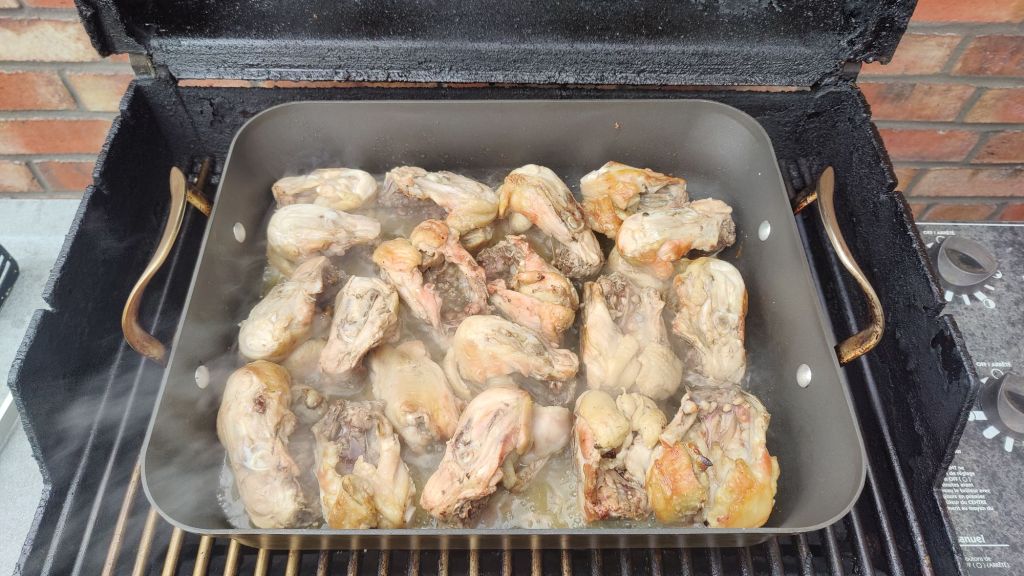
- Place the chicken backs in a deep roasting pan.
- Bake in a preheated BBQ on medium-low heat to render the fat—about 20 minutes. Alternatively, roast them in the oven at 180 °C (350 °F); we used the BBQ because our large roasting pan doesn’t fit in our oven. It’s fine if they brown a little, as this just adds a nice smoky flavour.
- Save some of the fat for your dog if you have one.
- Place five chicken pieces in the pressure cooker pot along with a batch of the vegetables, spices, and herbs. Fill with boiling water to the maximum line, close and lock the lid, and turn to high.
- Once the mixture reaches a boil, reduce the heat to maintain the highest pressure and pressure cook for 20 minutes.
- Remove from the heat and let it rest and cool for about 10 minutes. Slowly release the steam and open the lid when safe.
- Pour the stock through a strainer into the large stock pot and keep it hot but not boiling (yet) if you are planning to can the stock.
- If you are planning to freeze the stock, simply strain it into a large pot or bowl to cool and fill your freezer containers.
- Load up the pressure cooker with another batch of chicken and the other ingredients, and repeat until all are done and you have all of the stock in your cooker.
Instructions (canning stock):
- We left the finished stock in the stainless-steel cooker on warm overnight because it was too late to start canning. If you have a large enough container and refrigerator, you can cool it down and refrigerate it for a couple of days until you have time to can it.
- Heat the stock to boiling or high in the cooker.
- Using the dispenser feature of the cooker, fill the glass jars with stock and close the lids finger-tight. Pressure cook at the highest setting (under pressure) for 15 minutes, then remove from the heat and let cool enough to vent the steam and remove the lid.
- Remove the jars and let them cool on the counter. Start the next batch. When you hear the lids pop, you’ll know they’re sealed.
- Check all the jars to make sure they are sealed. If not, pressure seal again.
- Store your jars of liquid gold in a cool, dark place away from sunlight.


One Comment Add yours